
Conversion Tracking with RedTrack
How to connect RedTrack to Adexium so conversions come back to us via S2S postback. Postback endpoint, full parameter list, response codes and the postback key are described in S2S Tracker Basics — this page covers only the RedTrack-specific steps.
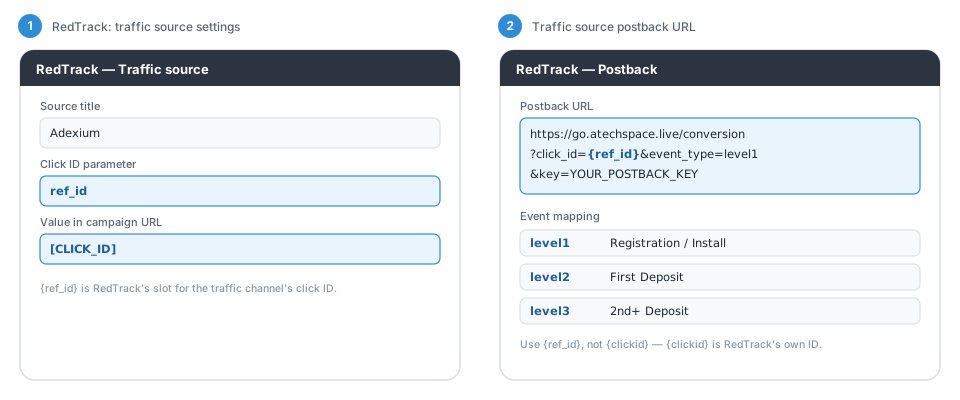
The illustration below is schematic: field names match RedTrack's settings, but the visual layout is simplified.
1. Traffic Source in RedTrack
In RedTrack create a custom traffic source "Adexium". Map our click ID to RedTrack's {ref_id} parameter — the click ID slot for incoming clicks from a traffic channel.
2. Traffic Source Postback URL
Set the source postback URL using {ref_id}:
https://go.atechspace.live/conversion?click_id={ref_id}&event_type=level1&key=YOUR_POSTBACK_KEYOptionally append &payout={payout}. Note: {clickid} is RedTrack's own click ID — for our postback you need {ref_id}, the value received from Adexium.
3. Campaign URL in Adexium
Copy the RedTrack campaign URL into your Adexium campaign so the ref parameter carries our macro:
https://YOUR-REDTRACK-DOMAIN.com/PATH?ref_id=[CLICK_ID]Event Mapping
| Event | Meaning |
|---|---|
level1 | Registration / Install |
level2 | First Deposit |
level3 | 2nd+ Deposit |
Verify
- Open the campaign URL preview in RedTrack and check that
[CLICK_ID]is present verbatim — the macro is replaced by Adexium at click time, not by the tracker. - Send a test click, take the real click ID from RedTrack's click log and fire the postback manually in a browser. You should get
{"message":"Accepted"}. - Check the Tracking page in the Adexium dashboard — the conversion appears in campaign statistics within a few minutes.
Questions — contact us via the support bot.